
Eating on the Run
By Karen Paulk
Happy New Year! 2020 is here, and I know many of us want to make healthier eating decisions. I usually do not get caught up making drastic changes early in the year, as I know by March or even Valentine’s Day that I’ve blown it. I just try to watch the sugar (my main problem), eat in moderation (I try to follow the Mediterranean diet), and drink within moderation. I try to get 1 to 2 days cardio into my schedule … and even that is hard. It always seems that I am eating on the run.
I’ve read the most radical thing we can do to improve our health is cooking real food at home. Now that sounds simple but having the time to make it is a luxury. Most people I know work, and I know when I get home that I do not want to think about cooking—but there is a solution: there are companies that can make your life easier by delivering groceries to your home that will make a good square meal. I have also read these programs are often less expensive in the long run because it cuts down on cost. If you were to do the shopping, you might buy more than you need and end up throwing some (or a lot) of money away.
The downside of someone shopping for you is that you are giving up some of the control and knowledge of exactly what you are putting into your body. However, back to the first problem—having the time and energy to cook a healthy dinner after a long day at work. Most of us own a slow cooker and or an “Insta Pot.” Those items will help with the time and convenience of meal planning, but still, you can’t make all your meals with them without your family getting bored quickly. One or two nights a week, though, will get you a wonderful stew, soup and/or casserole. How do you use the rest of the evenings? The answer: have the correct staples in your refrigerator, freezer, or pantry.
The ubiquitous rotisserie chicken can save you time for: tacos, enchiladas, soups, pizza, and more.
Next, have a good supply of frozen vegetables. I feel frozen is better than canned because of the sodium. Frozen vegetables are picked at their peak, which means they have more nutrients than even fresh that may have sat out too long.
Third, get canned beans. My favorite is the black bean because they add fiber and protein to any meal. I enjoy a fresh pot of beans, but time is the challenge. You can add beans to soups, stews and salads or purée into dips or sauté with veggies. One of my favorites is black beans that is loaded with garlic and served over rice with a side of sautéed vegetables.
Fourth, eat eggs. To me, they are the perfect food. Yes, they have cholesterol, but it is not for every night. Eggs by themselves are a great protein for dinner, and you can use them for quiches sandwiches, soups, pasta dishes, and more!
The fifth may be a surprise: the avocado. The monounsaturated fatty acids (MUFA’s) in this gem helps burn stubborn belly fat (the fat that burns fat!), boosts memory to prevent mental decline, and helps to regulate blood sugar, which reduces the risk of diabetes. Avocados are also loaded with lutein, an antioxidant that promotes eye health and helps stave off macular degeneration. Some ideas for these treats are: guacamole (everyone’s favorite), they replace cream or butter in your pasta sauces; stuff them with tuna or a seafood salad for a nice lunch or lite dinner, or make avocado toast. My favorite is to slice them on a warm tortilla with a pinch of salt for an avocado burrito. Sounds weird, I know, but I love it.
Eating on the run may be the curse of the modern life’s schedule, yet let’s all try to be better by eating our own cooking.
Enjoy!
BRINE IT!
By Chef K. Marie Paulk
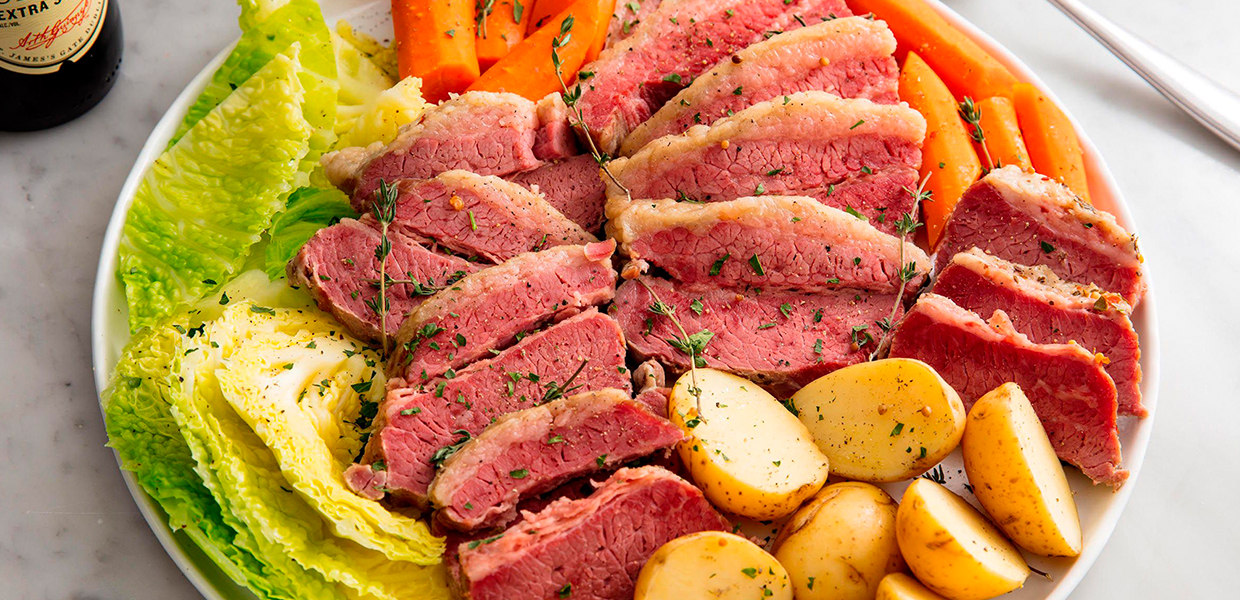
In general, to me, boiled meat does not conjure up images of delightful meals; however, come March 17th, all of that changes. That’s the unique day when we all roll out our green and claim a bit of Irish in our ancestry. Not many simpler or tastier tasks exist than boiling a corned beef for 4 to 6 hours and then making a meal of it with boiled potatoes and vegetables with a cold beer.
How did Corned Beef Brisket — which is cured in pickling brine containing salt, pepper, spices and potassium nitrate (AKA “saltpeter” that preserves the meat’s red color) — come to be the meal of choice every March 17th? To start, the term “corned” comes from the size of the salt grain used — approximately the size of a corn kernel. While the precise origins of corned beef have been lost in the pages of history, significant commercial production began with British industrialization and expansion in the 17th century, with much of it taking place in Ireland for cheaper labor. The Irish ironically did not consume corned beef much, as it was too expensive for them and considered a luxury item at the time.
Corned beef played a significant role in the potato famine of the mid-19th century, in turn creating the Irish migration to America. Because the Irish valued corned beef as an important export, they dedicated much of their agricultural land to cows, rendering the native Irish to do much of their farming for their food on lower-quality land (where the potato seemed to thrive). That famine, in addition to pushing many Irish to these shores, also pushed corned beef production to South America, as the need for cheap labor remained. In about 1873 in Uruguay, at the river port of Fray Bentos, corned beef began production under the label of Fray Bentos. Millions of pounds exported from then through WWII––and even today, as much as 80% of the world’s corned beef originates in South America, though not in Uruguay, but now from Brazil. Ironically today, Fray Bentos produces very little corned beef, and they have moved their production to Scotland.
In a twist of fate, after waves of Irish immigrants came to America, the once luxury product of corned beef from their homeland was much more affordable here due to its production in South America––which caused Irish-Americans to become big consumers of the product! As such, that is the root of how corned beef became the traditional dish for St. Patrick’s Day. Who knew that the quest for cheap labor and famine would significantly influence our meal planning every March 17th?
History aside, I know that many of us are trying to eat “cleaner,” so I would ask the question: “How about making homemade corned beef?” Those cryovac packages of beef, to me, seemed a bit foreboding. Yes, cryovac secures all the juices and moisture inside the package and will preserve the meat for relatively long periods, yet it does not enhance the flavor one bit. Are you up for the challenge of brining your own brisket? If you can plan about 4 or 5 days out and have space in your refrigerator, it may be worth your while.
Start with a 7 lb. boneless brisket (preferably), but you can substitute a top or bottom round with all the fat trimmed. NOTE: boneless is essential because the bone will rot and not pickle.
Then gather your spices:
24 juniper berries
12 black peppercorns
12 all spice berries
4 whole cloves
2 cardamom pods
Toast those in a frying pan by getting it hot (with NO oil), almost smoking, then add all the spices, and immediately remove from the heat and let the spices toast for approximately 5 minutes or until the pan is fully cool, shaking the pan a few times so they toast evenly. Once cooled, place the spices into a piece of cheesecloth and tie securely.
Bring 4 ½ quarts of water to a boil, adding:
Your cheesecloth bag of spices
2 ½ lbs. sea salt
3 cups of packed dark brown sugar
Optional: If you want your meat to have the traditional corned beef pink color, you need to add 5 teaspoons of pink pickling salt (NOTE: This is NOT Himalayan Pink Salt and it CAN be toxic if ingested directly).
Let the water boil for 15 minutes to dissolve the salt and sugar to make the liquid very salty. Remove from heat, add 6 cups of ice-cold water and let cool.
Then add the brisket and 6 bay leaves to the brine. NOTE: The meat has to be completely covered in the brine, so, add a plate or a weight to ensure that it stays fully submerged. Then refrigerate for 4 or 5 days, turning the meat daily.
When you’re ready to cook, remove the brisket from the brine and rinse (the brine can be discarded). Then slow cook as you would a traditional corned beef. I recommend adding a beer to your stock, which adds a malty flavor. I typically use a stout, like Guinness, but I have heard that a porter will add a hint of sweetness. Also, remember to not throw out the stock — save it for your cabbage, potatoes, and vegetable.
Enjoy the day and the meal. I know I’m looking forward to it. Don’t forget the soda bread!
By Chef K. Marie Paulk
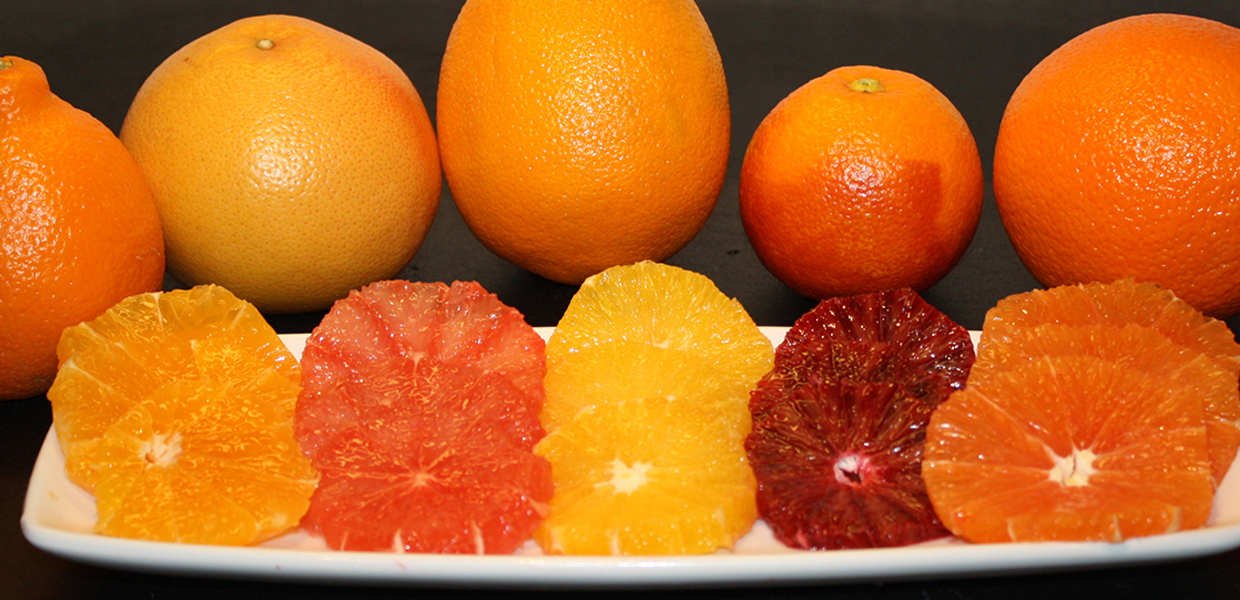
Well, they’re here, the weather has turned and as I type this there are Christmas trees sprouting up at our local Costco, right next to the Halloween costumes. I’m not sure what happened to the turkeys, but I’m sure we will see them soon too. I’m sure that many of you do not think about oranges when thinking about or planning your holiday festivities, but their season is really part of ‘the season.’ I still remember getting a Christmas stocking filled with oranges or tangerines, nuts for cracking and hard candy, it was a tradition. Oranges and tangerines are really abundant this time of year and the star in many winter fruit bowls.
All citrus fruits are native to a region stretching from East Asia southwards to Australia. Collectively, they are the third most important group of fruits, only apples, pears, and bananas surpass them in quantity produced and consumed. It has been calculated by botanists that the history of the citrus trees goes back 20 million years.
Valencia’s are originally from Spain, they are the most popular thanks to their thin skin and abundant juice. Their season is early summer to October and they are officially known as the summer orange.
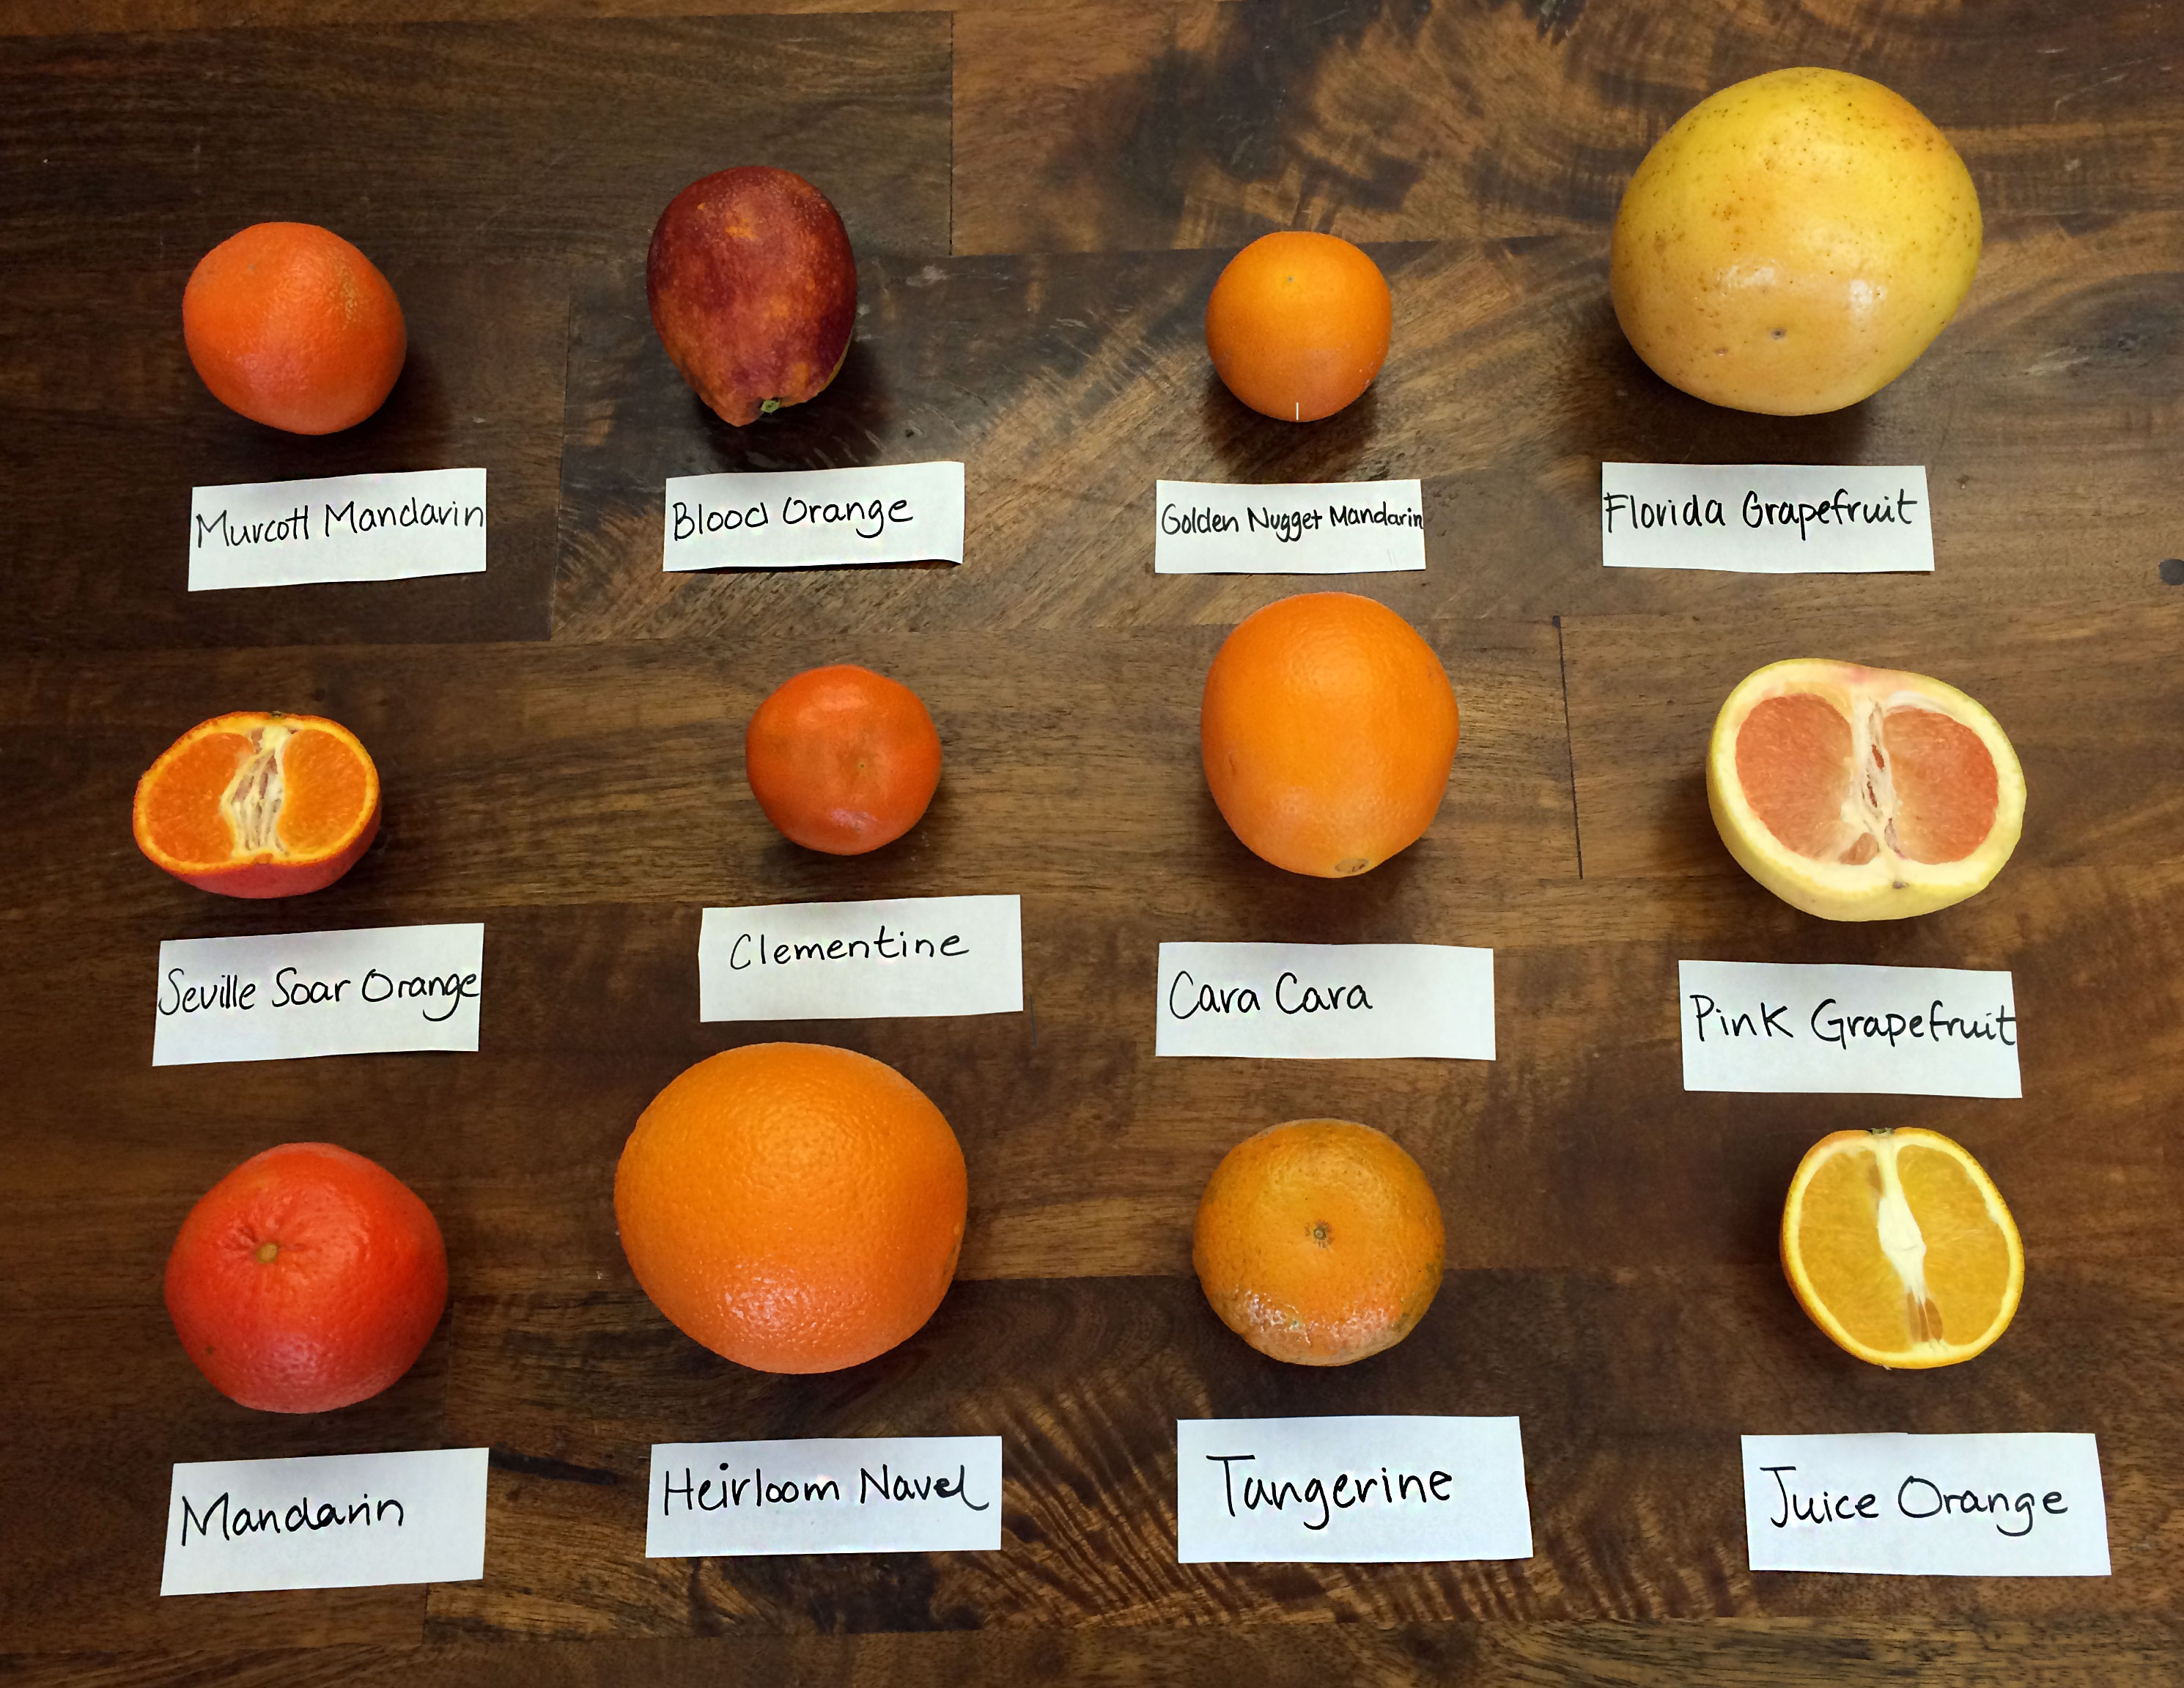
Navel oranges are the classic eating oranges. They are easy to peel, seedless, sweet and juicy. Cara Cara are sometimes labeled as navel’s, but they have a darker, pinker flesh and a sweeter flavor. Look for them from November through May. Navel oranges are originally from Brazil; they get their name from a second, smaller orange that develops at the base. This undeveloped twin looks a little like a belly button. They are a little less juicy than a Valencia, but they are virtually interchangeable when it comes to cooking and baking.
Blood oranges are harder to peel, but they are very juicy and sweeter than the navel or Valencia. The Moro blood orange is not as sweet, smaller, and their flesh is lighter. Their season normally runs from December to May. I always keep a sharp eye out for the blood oranges, as I consider them a special treat when I can find them.
Seville oranges are very fragrant, but dry and sour. They are high in pectin making them perfect for making marmalade.
Temple oranges are tangors, a cross between tangerines and oranges. They are juicy and almost tart. Their season is January through March.
Clementine’s (my favorite) have a better flavor than other tangerines, very sweet. They are seedless and easy to peel. They were first grown by Father Clement Rodier in Algeria. Their season runs November through April, but we are lucky to find these in the markets a lot of times throughout the year due to gapping. Some Chilean varieties pop up in the summer.
Satsuma tangerines have a mildly sweet flavor, juicy and also seedless. I am told they are normally the first to be found in the markets starting in mid-October through December.
Honey tangerines are very aromatic with their own distinctive flavor. Their skin is very thin, but they are very sweet and juicy. They are usually not found in stores until the first of the year.
Pummelo is the largest. It has a thick skin which peels off easily to reveal its sweet flesh. The grapefruit, which originated in the West Indies in the 18th century, is the offspring of the pummelo and a sweet orange.
Indio Mandarinquat is the smallest and I’ve read that they are the love child of the mandarin and the kumquat. Its flavor is acidic and full of seeds, but it candies beautifully.
Oranges and tangerines are a great snack, but their juice is also great for cooking and baking, making marmalades and candies. Slices of blood oranges used on fruit tarts can look spectacular. Using oranges in salads is also a winner, but knowing how to segment an orange is a necessary skill for this. I could explain how to do this, but it is best learned visually. I am sure there is a YouTube video out there you can watch.
We are lucky for where we live, we can find some of these varietals of oranges in the market year round, but they are at their best and least expensive in the fall and winter. Some of these fruits cannot be found at your local market and may require a trip to a specialty grocer or an Asian market, but I think it is worth the hunt. Oranges contain little starch and that is why they do not continue to ripen once they are picked. Remember, a heavy ripe orange will indicate its juiciness. A loose peel on a tangerine is normal, but if it is puffy it normally means it has passed its prime. You should refrigerate oranges when you get them home; which will help them last longer and taste better.
Happy snacking and baking for the holidays!
By Karen Paulk
Summer is here, and half the year has flown by. I am sure that a certain percentage of the population has started thinking about the holidays; and even scarier, some of you even have your holiday shopping started or done. Not me! I am still trying to figure out what happened to spring. Now that summer’s here, I want to appreciate the season. I want to celebrate summer with all the fresh produce and fruit the season brings. Our local farmers markets bring us all types of choices. With all these choices, we could talk about so many things, but I decided to stay with the subject I wrote about last issue, and that would be grilling. Not grilling protein, but the great side dishes you can create while your main course is also on the grill.
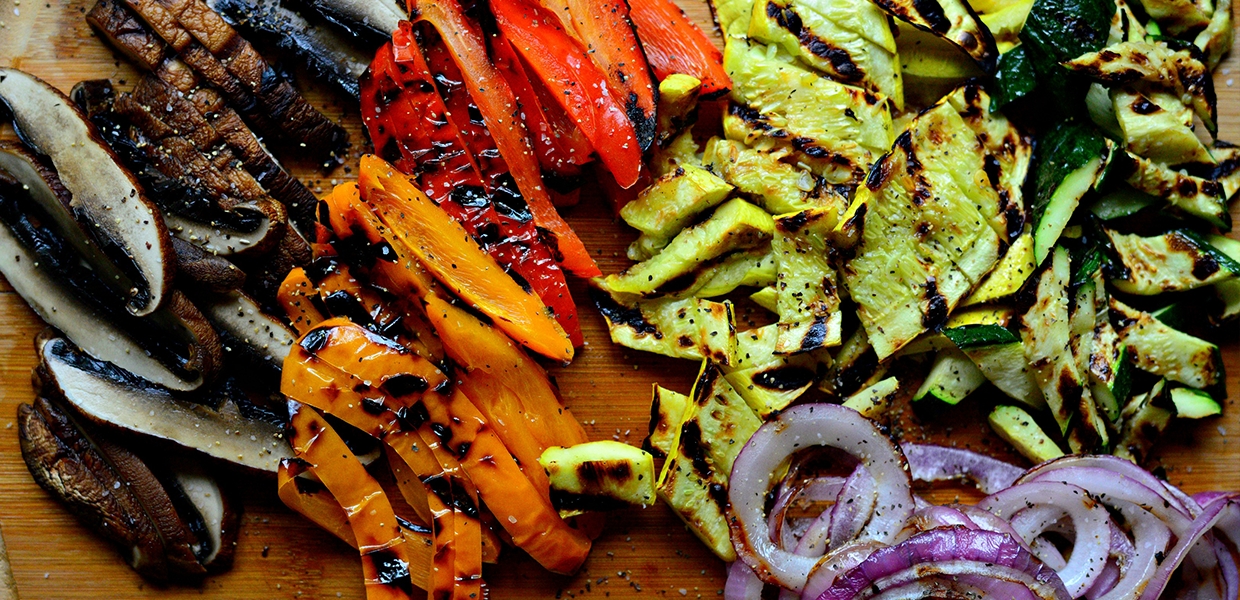
Grilling vegetables is so simple! The hardest part is prepping the vegetables, but the results are great. With grilling, the colors and the flavor of the vegetables seem to intensify when their sugars caramelize. The great part about grilling vegetables is it only takes 3 to 10 minutes, depending on the produce:
Onions: Grill 5 minutes on each side
Corn: 8 to 10 minutes
Eggplant (my personal favorite): 2 to 3 minutes on each side
Sweet Bell Peppers: 5 minutes skin side down then flip and grill for 2 minutes on the other side
Summer Squash: 2 minutes
Asparagus: 3 to 5 minutes
Portobellos: Grill sides up for 3 minutes, flip, and grill for additional 2 to 3 minutes.
Prep is easy: simply toss your vegetable of choice in a bowl with a little olive oil, garlic, and your choice of herbs, or you can do a simple marinade. You then grill and eat.
If you need a carb fix, just have some cooked pasta ready (cold or hot) and add it to your vegetables, and now you have a great side that takes no time at all to prepare.
Another interesting side is a grilled salad. Substantial and slightly bitter greens in the romaine and chicory families are perfect for the grill. Iceberg lettuce is also a great choice because its sturdy wedges grill up nicely. Radicchio has a bitter flavor, which marries well with a little smoke, and sweet, orange balsamic vinaigrette. Endive pairs well with an herbal dressing. Little gems work like romaine, but they are a bit sweeter.
Grilling your greens is both easy and fast. They absorb other flavors very easily, so a clean grill is a must. If you use charcoal, avoid lighter fluid, which can leave a chemical taste. You should have your dressing and toppings ready, as grilled salads are best served immediately.
A grilled Caesar salad is a very tasty choice. A grilled iceberg wedge with tomato, bacon, and blue cheese will also be a winner.
Another great choice for the summer grill is pizza. A wood-burning pizza oven would be a dream, but all you really need is a grill. At first, grilling dough was a little intimidating to me, but give it a try. You will be a pro once you grill or burn one or two pizza doughs (just a little practice is needed). You can make your own dough (which is very easy) or save a little time and buy pre-made pizza dough at the store. You should be able to find pre-made dough at almost every grocery store now.
You will want to start with a hot grill. Turn the heat on high for one side and the other as low as possible. If you’re using charcoal, get the coals white hot, and then brush them into a ring around the perimeter of the grill. You won’t need to invest in a pizza stone, but a pizza peel is very helpful.
First, roll out dough that best fits your grill. Fold the dough in half, lift it, place it on the coolest part of the grill, and unfold it so the whole crust is on the cool side. NOTE: there is no need to oil the grill.
Cover and wait about 3 minutes. Inspect to see if the dough has started to bubble on top. Once the bubbles appear on the top, carefully lift an edge with a spatula to check for grill marks (make sure they’re not too dark). Once you have the color you want, pick the dough up with a couple of spatulas. Have your peel readily dusted with cornmeal or flour, set the dough on the peel, raw side down. Away from the grill add your toppings. You can add the toppings over the grill, but that does take some skill not to burn yourself. Once you have placed your toppings, slide the dough back onto the grill (cool side) and close the lid. You will need about 10 minutes to finish the pizza to get nice grill marks, though not burnt. The toppings, sauce, and cheese are your call; however, I would recommend taking advantage of your grilled vegetables to also use as a topping.
Let’s not forget dessert. Grilled peaches with a nice balsamic reduction topped with vanilla ice cream would complete any meal.
Enjoy your summer days and stay out of the hot kitchen because before you know it, fall will be here.
 Vinny & Rosie’s in Suisun City may be your newest go-to American restaurant
By Matt Larson
Opening a restaurant is a dream many of us have, but few of us ever achieve. Every new restaurant you see probably has a long story behind it of how it finally came to be, and Vinny & Rosie’s in Suisun City is no exception. Owner Roy Salvemini had the restaurant dream for years. When the opportunity presented itself to finally do it, he took the chance and went for it. They’ve been open since September 1, 2017, and they’ve since been making waves throughout Solano County and beyond as being known for some of the best burgers around. So what makes them so good?
“They’re quality,” said Salvemini. “100 percent ground sirloin; no fat filler. Probably the most expensive burger you can get on the market, but we don’t charge that for it.” We all know how expensive restaurants can be; it’s just the way it is. But now that Salvemini has his own place he’s made a point to offer the fairest prices that he can for his customers. “I wanted to keep our prices reasonable,” he said. “Customers are getting something good for what they’re paying for. It’s what I enjoy most about having the restaurant at this point.”
Providing more than just burgers, Vinny & Rosie’s specialize in American fare. Fan favorites, aside from the burgers, include their pulled pork, and tri-tip sandwiches. A big part of opening the restaurant was that Salvemini wanted to share the wealth of his mother’s cooking with his greater Suisun City community. Named after his father, Vinny, and his mother, Rosie, this restaurant exists truly in their honor. Salvemini grew up going to football, baseball, and basketball games with his father, so he installed a bunch of TVs to give the restaurant a sports theme. And the menu is heavily inspired by his mother’s cooking, some of which are her actual recipes. So with the sports theme from his father, and much of the menu from his mother, Vinny & Rosie’s is a pretty fitting name for this restaurant.
“A lot of our menu items are homemade recipes, based on my mom’s cooking,” said Salvemini. The meatballs, potato salad, macaroni salad, meatloaf, pulled pork, stuffed mushrooms, and marinated shrimp for their shrimp skewers are all prepared according to Rosie’s specifications. Salvemini’s favorite menu item is the potato salad; it’s something he grew up with, so it’s close to his heart. But the burgers are really their calling card these days.
“It’s hard not to get the burger because it’s so good!” he said. “It’s the first thing you think about when you go there. Honestly, it’s something that most places can’t really compete with.” They provide plenty of variety with their burgers, like the Jalapeño Jack (pepper jack, bacon, jalapeños, lettuce, tomatoes, guacamole), the Pineapple Teriyaki (pineapple, teriyaki sauce, lettuce, tomatoes, jalapeños, mayo), and, their most popular, the Great Western (cheddar, bacon, onion rings, barbecue sauce). You can also build your own.
“We also have a burger called the Ultimate Western,” Salvemini said. “It’s on the menu, but people get a little nervous to try it.” That could be because not only is it a half-pound burger with cheddar, bacon, onion rings and barbecue sauce, but it’s also topped off with a couple slices of tri-tip steak. “People have been very happy after they eat that one,” he said. “I’ve actually had a guy walk up to my cook and just handed him money after he was done, saying it was the best burger he’s ever had. I’ve never seen that happen before, it was pretty cool.”
Something else that you don’t see happen too often, is that on Mondays here at Vinny & Rosie’s, kids eat for free! As long as they’re with an adult purchasing a meal, your child is welcome to join at no extra cost. So if you’re having a “case of the Mondays,” Vinny & Rosie’s could certainly brighten your day.
Vinny & Rosie’s isn’t like your average restaurant. They just had their first “Chow Down Comedy Show” in March, they have regular trivia nights every Tuesday (at this writing) which have been pretty popular, and they also offer monthly paint nights.
“We’ve done [a paint night] once a month since we’ve been open,” said Salvemini. “We have a regular paint night, and then we have a ‘Mom & Me’ one—those are super popular.” Both paint nights you’ll have an instructor, and a provided canvas, paint, and brush for you to follow along with the class. At the Mom & Me paint night your child gets a smaller canvas, so they can also participate, and if it’s on a Monday, yes, your child eats for free. At the regular paint nights your ticket also gets you an appetizer and a drink (beer, wine, or well … or soda).
Salvemini always looks for special event opportunities, like having corned beef and cabbage for St. Patrick’s Day. They’re also preparing themselves for Mother’s Day and Fourth of July, both of which are very popular events in downtown Suisun City.
Vinny & Rosie’s is also connected to Jack’s Pub, and they work together to share their menus with customers on both sides. “We serve food into the bar, and you can order their drinks from our restaurant,” said Salvemini. “It’s all one in the same, you can walk in between, go back and forth, and sit in the bar and order food if you don’t want the restaurant experience.”
Active in his local community, one of the greatest perks with starting this restaurant for Salvemini has been being able to support local community organizations by providing catering for their fundraisers. They’ve already catered events for the Crystal Music Boosters, Holy Spirit School, Armijo Water Polo, and they’re sponsoring a fundraiser for the Suisun American Little League. Salvemini’s currently president of the Armijo music boosters. He’s been involved with these types of organizations throughout his kids’ childhood, who are now in high school, and he knows how much these programs need help. “One of the best things about this restaurant is being able to help other people out when we can,” he said. “If you want to do a fundraiser, let us know.”
Open every day but Wednesday, come check out this great new restaurant, and give these burgers a try! They’re located at 603 Main St., Suisun City. Call them at (707) 803-5404 or visit vinnyandrosies.com. To keep up with all their local happenings, follow them at facebook.com/VinnyandRosies.
 Larson is an actor/comedian/director from Vallejo who lives a double life between the Bay and LA. When he’s not writing for Local Happenings Magazine he could be editing a short film or working on his next rap album—who knows!
Keep up with all things Larson at www.MarsLegstrong.com.”
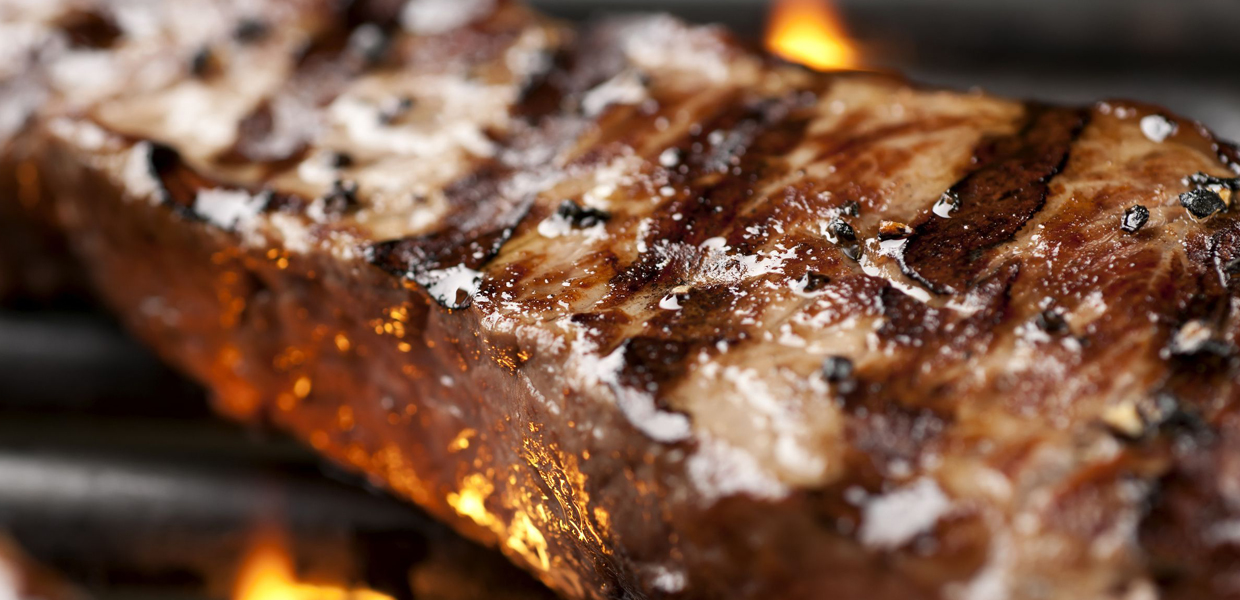 Grill Marks
By Chef K. Marie Paulk
Spring is here, and summer is right around the corner. With the longer days upon us, many of us will be firing up the barbecue. Seems like only yesterday when I was in my second semester at culinary school, and “protein” was the subject for the next six weeks. I was more than a little nervous about grilling, especially when grill marks were mentioned. Grilling was not really something I had big interest in since my husband, the self-declared grill master, was so eager that he’d always take the lead at home. It turns out that grilling isn’t so hard; I guess that is why so many of us love it. Once you learn where your hot spots are on your grill, it is pretty easy to control, especially with an instant read thermometer.
Usually, when we refer to meat, we are talking about an animal’s muscle because it’s the major component of meat as we know it. But animals are made up of four major tissues: muscle, fat, bone, and connective tissues. Lean meat is about 72% water, 20% protein and about 7% fat. The fat increases and water decreases in muscle as the animal grows older.
Personally, I am not a big eater of red meat. Chicken is normally my choice, but a bone in ribeye or tri-tip is something I crave now and again. When I lived in Texas, I found it strange that I could not seem to find a tri-tip. However, with a drive about two hours north to New Mexico, tri-tip was readily available.
A good ribeye needs to have plenty of marbled fat (connective tissue). This fat is the main consideration in the grading of the meat. Prime grade (the best grade) has the best marbled fat, which makes the meat more tender. Fat stretches the connective tissue, surrounding meat fibers, making them soften during the cooking process, and it also contributes to the flavor by melting into the fibers, so that the meat melts in your mouth.
Everyone has a preference on how they would like their steak seasoned. Salt is the one component that is needed, and it is best to use a coarse salt. After ten minutes, the surface of the steak become moist as the salt draws out juices (which are water and savory liquefied protein). Ideally, you should salt your meat at least one hour before grilling, letting your steak rest under refrigeration; some of the liquid will be reabsorbed with the salt to add flavor and moisture. If you have the room in your fridge, you can salt up to eight hours before and even more will reabsorb. Prior salting will leave a thickened liquid on the surface that will help with creating a crust during grilling.
Back to the grill marks, you may have been told that searing the meat will seal in the juices of the meat; however, that is not true—the key to a juicy steak is not to overcook it. When your meat approaches 120°F, the protein will start to coagulate and squeeze water from the cells. Cooking your steak above 155°F will cause most of the moisture to be lost, which will result in a dry steak.
Another factor for tenderness is how long the meat was aged. Using dry or wet aging will not make a big difference in taste, but when the butcher trims a dry-aged piece of meat, there will be more loss, so dry aging will cost more. Aged beef, without a doubt, makes the meat more tender and flavorful. Aging allows enzymes in the meat to break down proteins into more flavorful amino acids, glycogen into sweet sugars, and fats into aromatic fatty acids. It allows the meat to tenderize more quickly and at a lower temperature, meaning less water is squeezed out during the cooking process.
Here in the Bay Area, we can find all kinds of different cuts of meat. Some can be costly to a large party or family but knowing more about the different cuts and knowing where to find (or ask for) them can help.
Sirloin Flap Steak: These are well-marbled strips, the tails of the porterhouse and T-bones. More tender than skirt steak but with similar grain and meatiness. You could also find it labeled as bavette or flap meat.
Tri-Tip Roast: This cut comes from the bottom of the sirloin. If you see a steak labeled Newport steak, it was cut from the tri-tip.
Skirt Steak: Used famously for both fajita’s and in Philadelphia steak sandwiches. Believe it or not, as my husband told me, the butcher would normally throw this piece away back in Texas in the 70’s. It is a well-marbled muscle cut from the diaphragm and the abdominal muscle.
Flat Iron Steak: Cut from the shoulder blade, once the gristle is removed you get two 12 to 16 oz. steaks. This steak will stay tender, even when it is cooked medium well.
Top Butt: It comes from the tender part of the sirloin, which your butcher can cut to any thickness.
Hanger Steak: This is probably the most difficult to find since there is only one per steer. It comes from the last rib attached to the diaphragm. It is also known as the Butcher’s Steak, since some butchers would keep this piece for themselves.
I hope you find this information helpful, unless you are a vegetarian or pescatarian, in which case I can recommend some tasty grilled vegetables with perhaps a nice halibut or sea bass. Happy grilling!